fbpx
Skip to content
Hjem » A cute decorative edging

A cute decorative edging

There are many ways to spice up your sewing project and make it look like a treasure sent from heaven. If you dig into your grandma's closet, you will find many clothes with nicely finished details. There was a lot of passion, effort, and time put into every handmade piece, and today the focus has shifted. Cost and production time set the tone for the finished garment, and the most delicate details have been tossed on that behalf.
If you look in your grandmother's old robes, many fine details are to be inspired by. Back then, a lot of time, passion, and finesse was spent on each piece of needlework, so it appeared beautiful and finished. Today, price and time often have a great impact on the end product, and therefore many small, fine details disappear. When you sew yourself, you have the chance to put as much time and energy into your project as you like, and there are virtually no restrictions.

The project is in your hands now, and you can do whatever you want, and take as much time as you want and need, so today, I will give you some tips on how to make nice decorative stitching, which can be used as a finishing on edge.

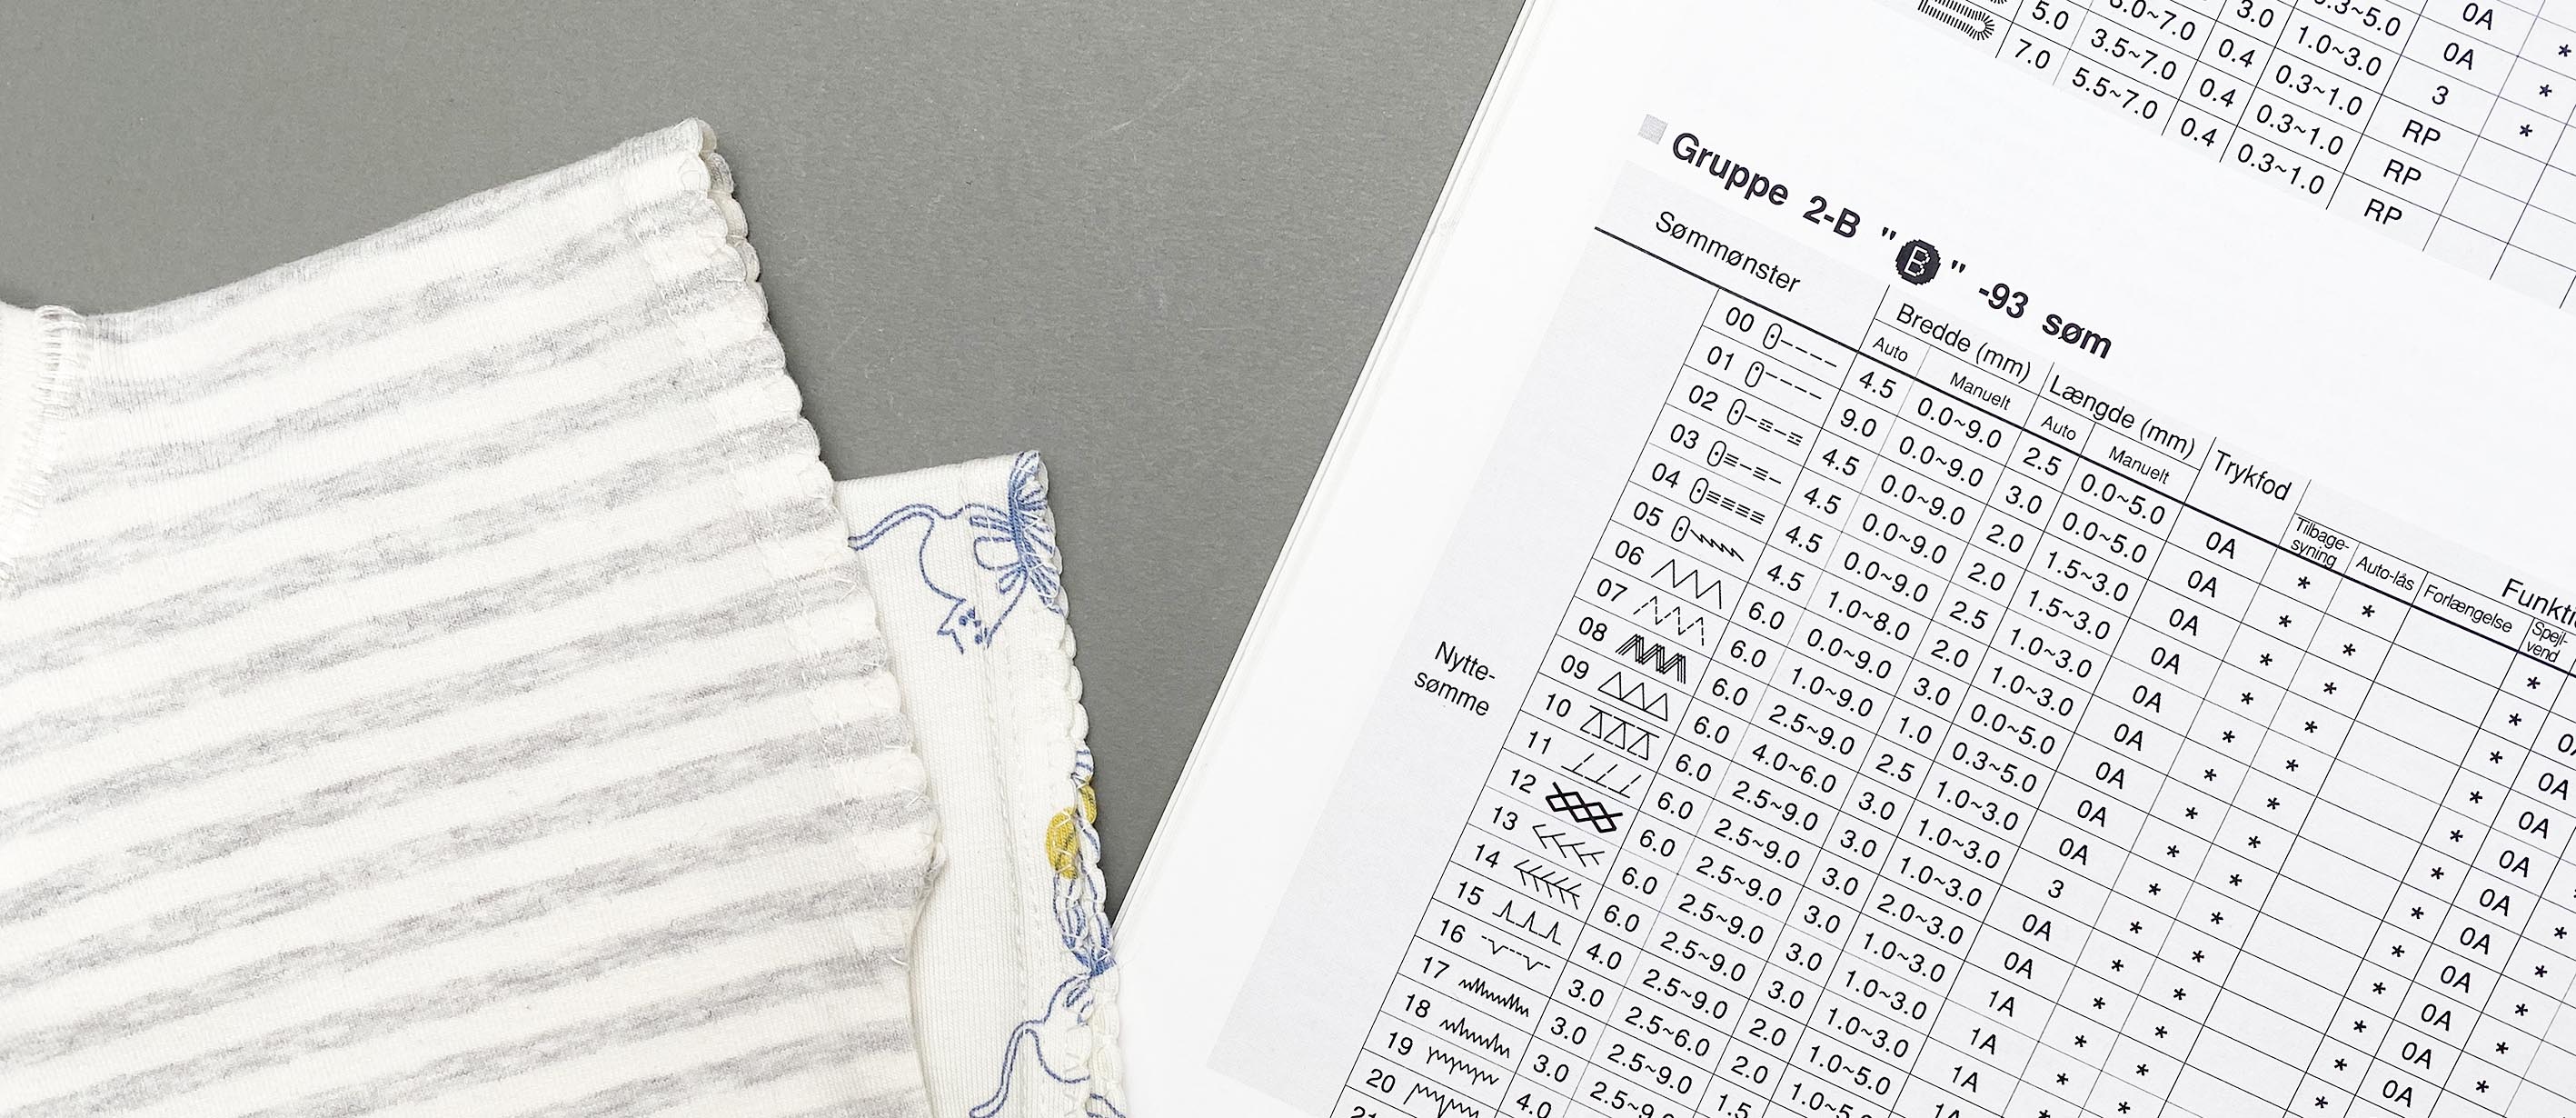
Your sewing machine probably has a range of decorative stitches, which can be found in the instructions manual. The stitch used as an edging on this picture is partly a twin needle stitch for a start and then edged with a decorative shell tuck stitch (stitch No. 15 shown in the diagram next to the sewing samples. It probably has a different number on your sewing machine). I have sewn the shell tuck with the longest stitch length the machine allowed, but try it out; any width has its charm, both the narrow and the wider ones. But go ahead and set your creativity free with all the other versions that are on your machine!

Leave a Reply

Vi bruger også cookies - det er nødvendigt for at få webshoppen til at fungere optimalt.   Læs mere

en_US